
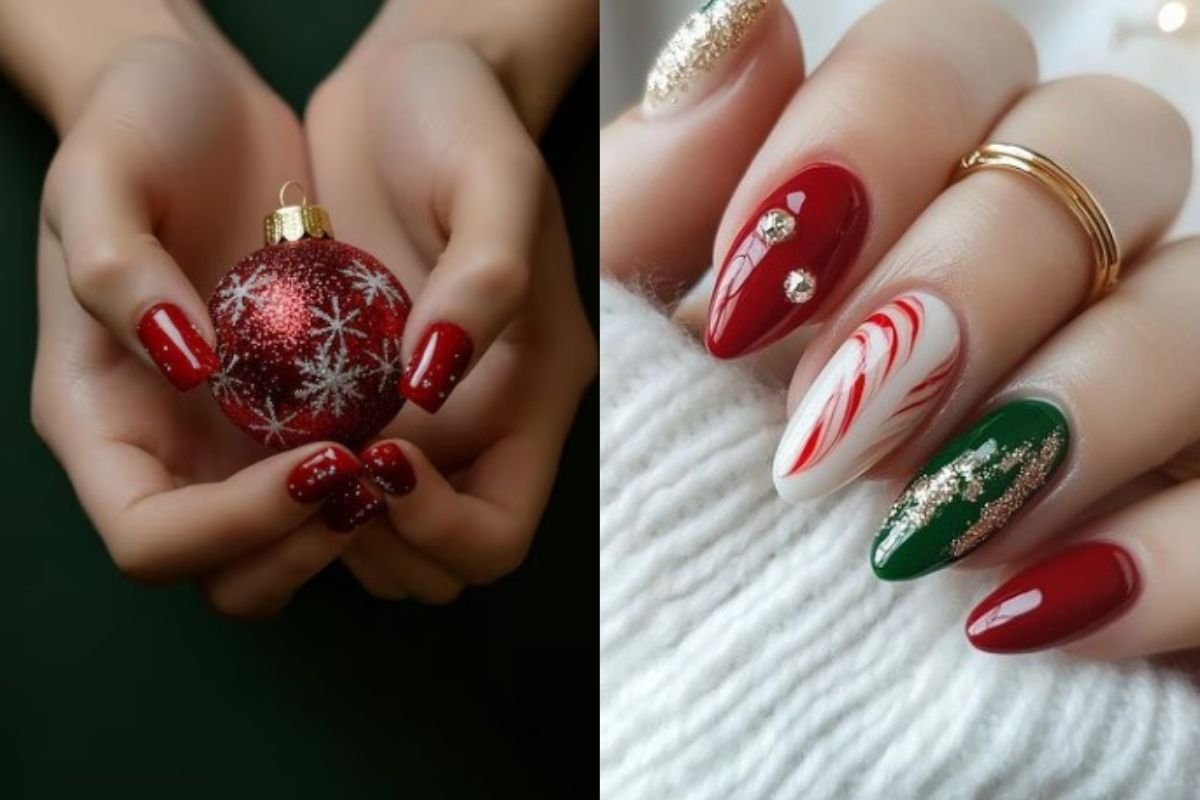
Christmas is a lovely excuse to try nail colors and designs you might not wear during the rest of the year. Deep red polish, sparkling gold details, tiny snowflakes, and playful candy cane stripes can make even a simple manicure feel festive. The best part is that you do not need long nails or complicated nail art to enjoy the season.

These Christmas nail ideas include a mix of classic holiday shades, soft winter colors, glittery finishes, and cute seasonal patterns. Some designs make a statement, while others keep things simple enough for everyday wear, family gatherings, office parties, and Christmas dinner.
If you searched for “Cristmas nail” inspiration, this collection will help you choose a look that suits your personal style. Pick a design based on your favorite colors, nail length, and how much detail you want. You can also ask a nail technician to adapt an idea to your preferred shape, or try a simpler version at home with polish and a fine nail art brush.
1. Classic Red Christmas Nails
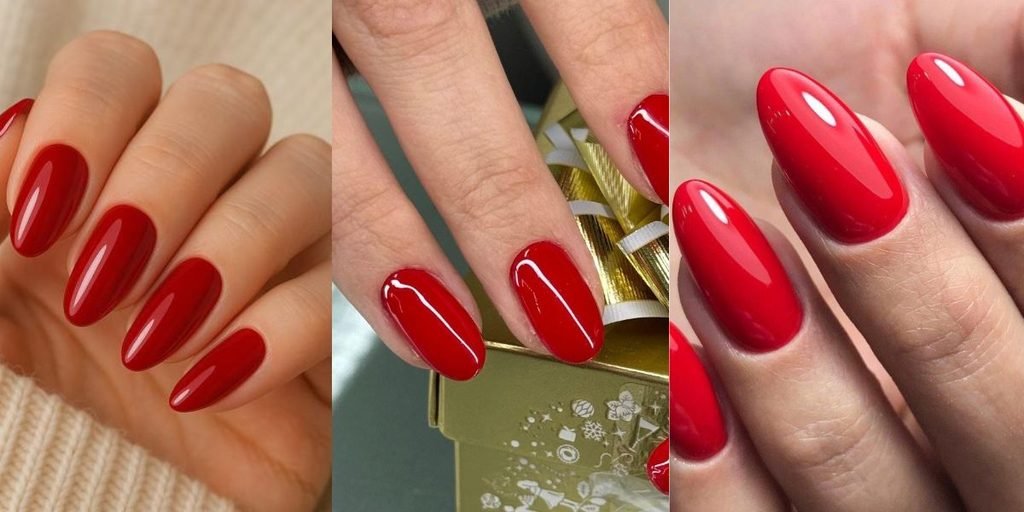
Red nails are a holiday favorite for a reason. They look festive without needing extra decorations, and a glossy red manicure works with everything from cozy knitwear to a dressy Christmas outfit. Choose a rich cherry red for a bright finish or a deeper wine red for a more dramatic look.
For a neat result, apply thin coats instead of one thick layer. Let each coat dry before adding the next, then finish with a glossy top coat. If you want a little variety, keep most nails solid red and add one accent nail with fine gold glitter.
Short, rounded nails look clean and practical in this shade, while almond-shaped nails give the color a longer silhouette. You can also choose a matte top coat if you prefer a softer finish.
Why Choose Classic Red Nails?
- Perfect for traditional Christmas outfits.
- Looks beautiful on short, medium, and long nails.
- Works well with glossy, matte, or glitter finishes.
- Easy to recreate at home with red nail polish.
- Pairs beautifully with gold jewelry and festive accessories.
2. Red and Gold Christmas Nails
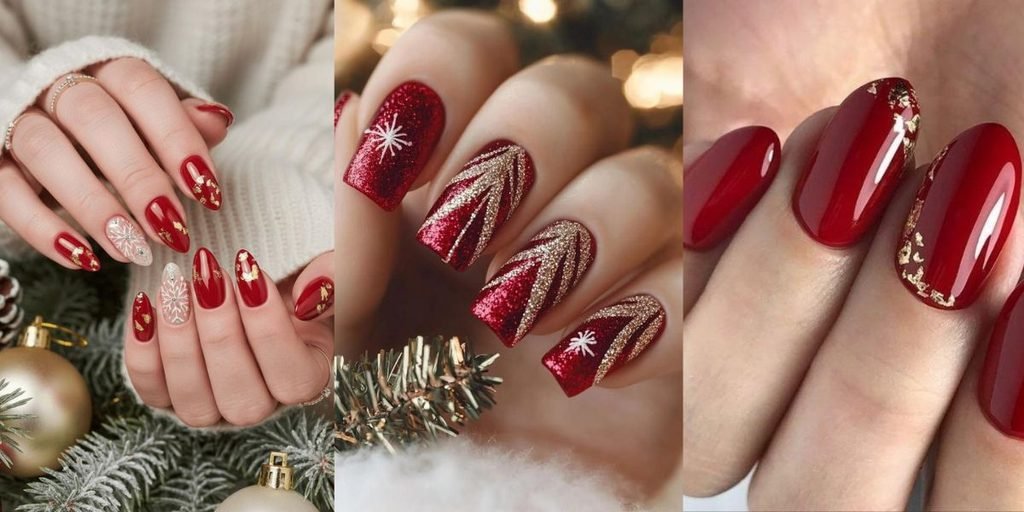
Red and gold make a rich holiday combination that works especially well for parties and evening celebrations. Start with a red base, then add gold foil, glitter tips, or a small gold accent near the cuticle. The contrast gives the manicure a festive finish without requiring a detailed design on every nail.
For a balanced look, choose one main feature. For example, paint three nails red, add gold glitter to one nail, and use a tiny gold star on the remaining nail. If you prefer a quieter manicure, use a thin gold line over a deep red base instead of covering the nail in glitter.
This combination looks lovely on both short square nails and longer almond shapes. Keep jewelry simple if your manicure has lots of sparkle, or coordinate it with gold rings for a pulled-together holiday look.
✨ Gold Detail Tip
Place gold foil or glitter on just one or two nails when you want a festive manicure that still feels easy to wear.
3. Green Christmas Tree Nail Art
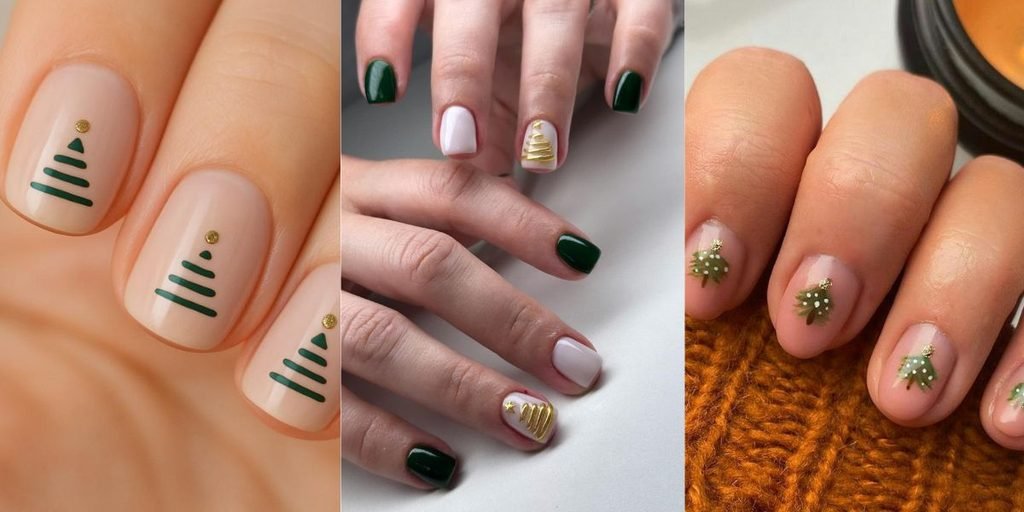
Tiny Christmas trees turn a simple manicure into something playful and seasonal. A nude, milky white, or pale pink base gives the green design room to stand out. The tree itself can be drawn as a simple triangle, a few angled lines, or layered green strokes. Add a small gold dot or star at the top if you want a classic holiday detail.
You do not need to decorate every nail. A tree on each ring finger, paired with solid green or cream polish on the other nails, keeps the look tidy. For very short nails, a small triangular tree with just a few branches is often easier to create than a detailed miniature illustration.
Use a fine nail art brush or a dotting tool to build the shape slowly. Let each layer dry before adding ornaments, and seal the finished design with top coat to help protect the art.
🌲 Build a Simple Tree Nail
4. Candy Cane Striped Nails
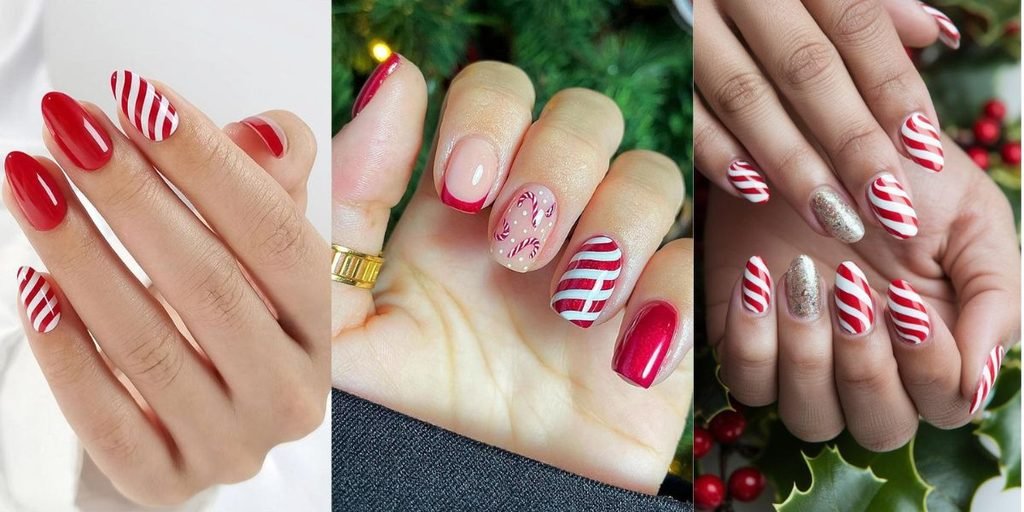
Candy cane nails bring a familiar Christmas pattern to your fingertips. The classic version uses a white base with thin red diagonal stripes. You can put the pattern on every nail for a bold look or use it on just one or two accent nails alongside plain red polish.
The secret is keeping the stripes fairly even. Nail striping tape can help create clean lines, while a thin brush gives you more control if you prefer a hand-painted design. Wait until the white polish is completely dry before adding red, since working too soon can cause the colors to drag into each other.
For a softer variation, swap bright white for a milky shade. If you like a little shine, add a clear glitter top coat rather than extra decorations. This design is especially fun on rounded or oval nails, but the pattern can be adjusted to fit most nail shapes.
Candy Cane Color Pairing
5. Snowflake Christmas Nails
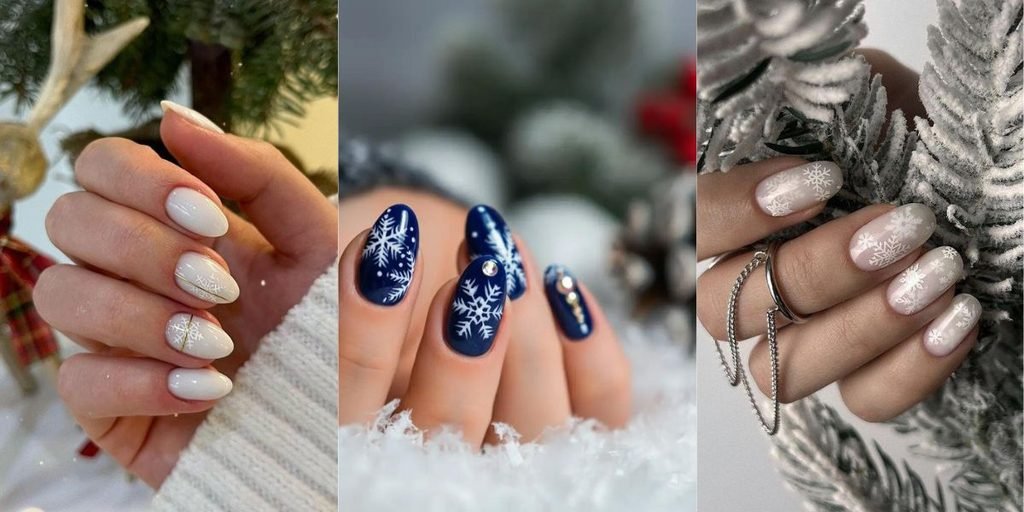
Snowflake nails have a wintery feel that can be delicate or dramatic, depending on the colors you choose. White snowflakes on a deep blue base create a crisp, frosty look. On a sheer pink or milky white base, the same pattern feels lighter and more understated.
For an easy design, paint most nails in one shade and place a single snowflake on each accent nail. Small dots around the snowflake can suggest falling snow without crowding the design. Silver glitter also works well, especially if you want a little sparkle for a Christmas party.
Snowflakes look detailed, but their shapes can be simplified. Start with a few thin lines that cross at the center, then add tiny branches near the ends. Keep the brush strokes fine so the pattern stays visible rather than becoming a blob of polish.
❄️ Three Snowflake Styles
- Soft: White snowflakes on a sheer pink base.
- Frosty: Silver details over pale blue polish.
- Bold: White snowflakes on navy blue nails.
6. Milky White Winter Nails
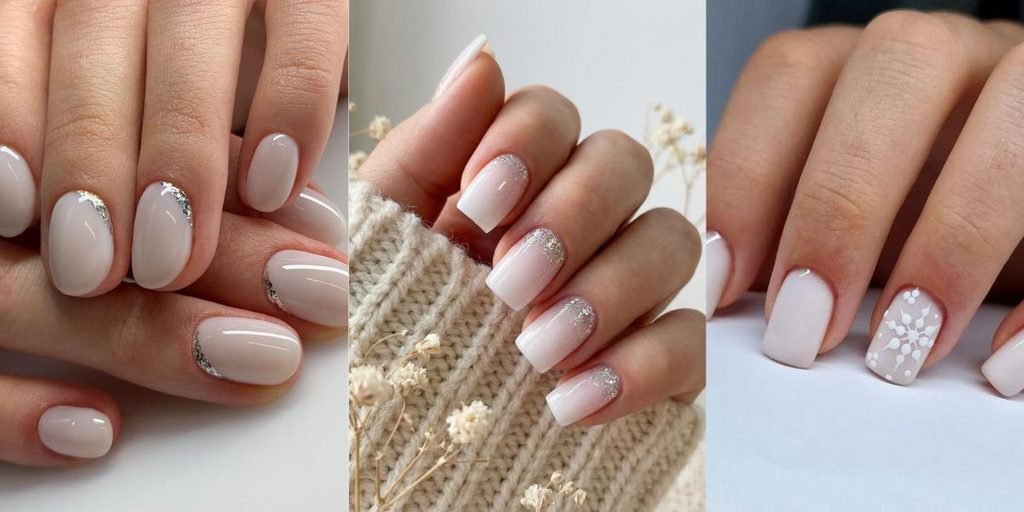
Not every festive manicure needs red and green. Milky white nails offer a clean, soft look that pairs easily with winter outfits and dressy holiday clothing. The slightly sheer finish gives the nails a natural, polished appearance, while a fine layer of shimmer can make them feel more special for Christmas.
Ask for a milky white polish rather than a fully opaque white if you prefer a softer finish. You can leave every nail plain, add a tiny silver star, or place a little glitter near the tips. Another option is to use a white snowflake on one accent nail while keeping the rest simple.
This design is a useful choice if you want your nails to look neat beyond Christmas Day. It also suits different nail lengths, so you do not need extensions to recreate it. A smooth base and carefully applied top coat help the sheer color look even.
Milky White Manicure Checklist
✓ Choose a sheer white or milky cream polish.
✓ Apply thin coats for an even finish.
✓ Add one small silver detail if you want extra sparkle.
7. Red French Tip Christmas Nails
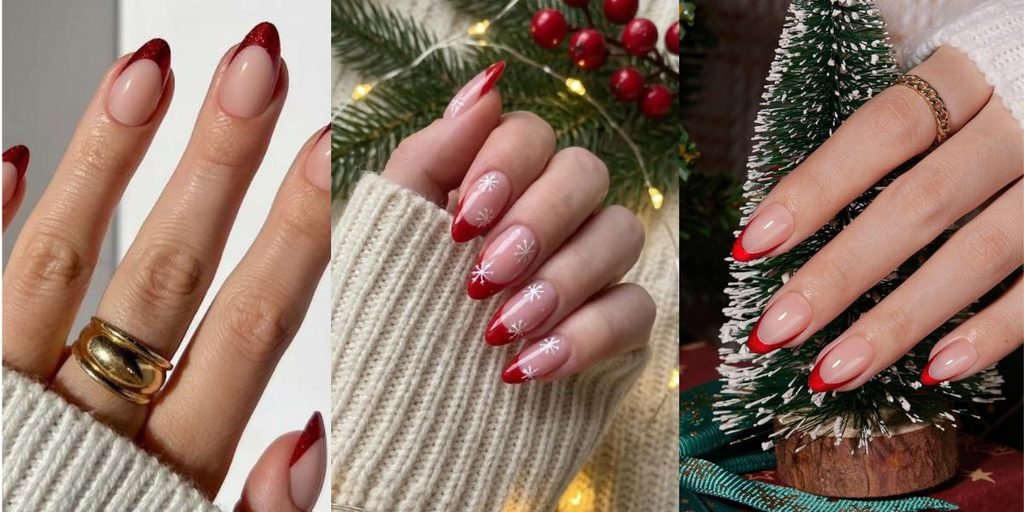
Red French tips are a lovely middle ground between a classic manicure and full Christmas nail art. The natural or pale pink base keeps the look simple, while the red tips bring in a festive color. You can choose a narrow line for a subtle finish or a thicker tip for a bolder statement.
A curved French tip follows the natural edge of the nail, but a diagonal or V-shaped tip can make the design feel more modern. If you want a little holiday detail, add a tiny gold star or one small white dot to a single nail. Keeping the decoration limited lets the red tips remain the main feature.
This style works well on short nails, too. A thin tip can make a short nail look neat without taking up too much space. For a salon appointment, bring a reference photo showing the width and shape of the tip you prefer.
Choose Your Red French Tip
Simple and understated.
More noticeable and festive.
8. Glittery Gold Holiday Nails
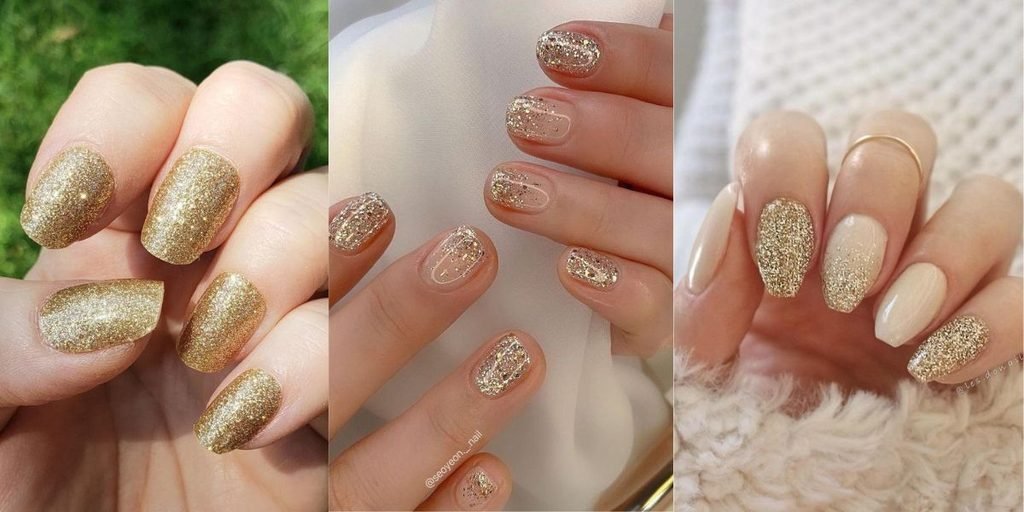
Gold glitter nails catch the light beautifully and work well for Christmas parties, dinners, and New Year’s celebrations. You can go all out with glitter on every nail or use a champagne shimmer for a softer finish. Gold also pairs nicely with red, deep green, black, cream, and blush pink.
For a more wearable version, apply glitter only to the tips or the ring fingers. A gradient effect, with more glitter near the tips and less toward the base, can look especially pretty. If you are using loose glitter or a textured polish, seal the surface with a suitable top coat to help smooth the finish.
Consider the rest of your outfit when choosing the amount of sparkle. A glitter manicure can be the main accessory, so you do not need to add elaborate nail art on top of it.
✨ Pick Your Glitter Level
Fine champagne shimmer
Glitter accent nails
Full glitter manicure
9. Green and Gold Christmas Nails
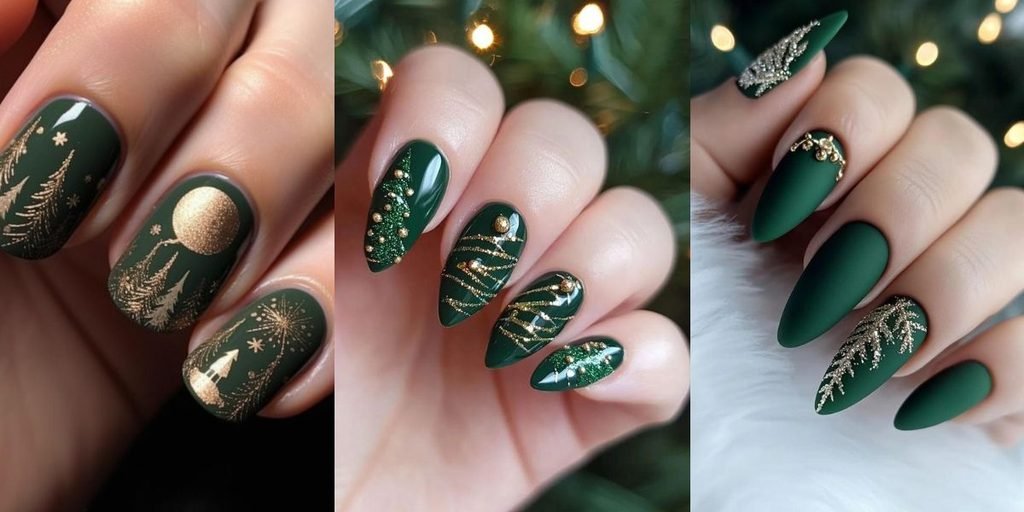
Deep green and gold create a rich Christmas combination that feels a little different from the usual red manicure. Choose forest green or emerald polish as the main shade, then add gold foil, a glitter accent, or a fine gold line. The result looks festive without needing lots of tiny decorations.
One easy approach is to paint most nails green and reserve one nail for gold glitter. If you like nail art, try a small gold star or a simple curved line over the green base. You could also alternate solid green nails with a gold accent nail for a balanced look.
This color pairing works particularly well with cream sweaters, black outfits, and gold jewelry. For a softer result, use a muted sage green instead of a dark emerald shade. For a more dramatic manicure, choose a glossy forest green and keep the gold details crisp.
10. Cute Santa Hat Nails
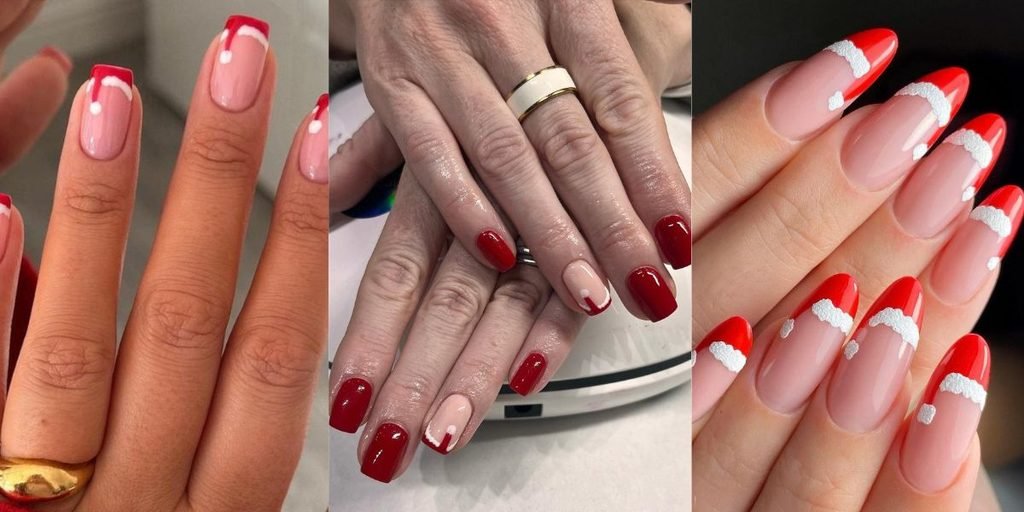
Santa hat nails are a playful choice if you like cute Christmas details. The design usually features a red triangular hat with a white brim and a tiny white pom-pom. A nude or pale pink base helps the little hat stand out, while red polish on the other nails ties everything together.
Because the hat has several small parts, it is often best to keep the design on one or two accent nails. This gives the illustration enough room to look clear. On short nails, use a simple red triangle and a white line at the bottom rather than trying to add too many details.
You can make the manicure more subtle by painting the rest of the nails a sheer neutral shade. For a bolder holiday look, pair the Santa hat accent with glossy red nails. If you are doing it at home, a fine brush or dotting tool can help with the brim and pom-pom.
🎅 Santa Hat Design Checklist
11. Gingerbread Christmas Nails
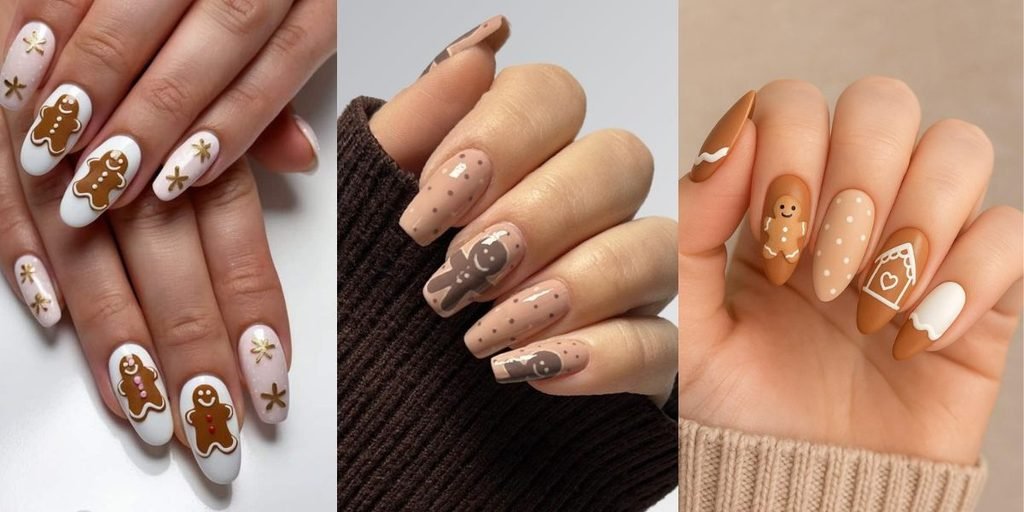
Gingerbread nails bring a sweet, whimsical touch to a holiday manicure. Warm brown polish represents the cookie, while white lines create the icing. Tiny dots, buttons, and smile details can make a gingerbread character look extra cute. A beige or cream base helps the brown design feel warm rather than too dark.
You can choose a gingerbread character on one accent nail and use caramel, cream, or chocolate brown on the others. Another option is to draw small cookie shapes across a pale base, though a simple design is often easier to read on shorter nails.
This idea is especially fun for casual Christmas gatherings, baking days, and festive photos. Keep the icing details thin so they do not overwhelm the nail. If character art feels too difficult to paint by hand, ask a nail technician about a small decal or sticker made for nail use.
🍪 Gingerbread Color Palette
Cookie brown
Icing white
Caramel beige
Festive red
12. Pink Christmas Nails
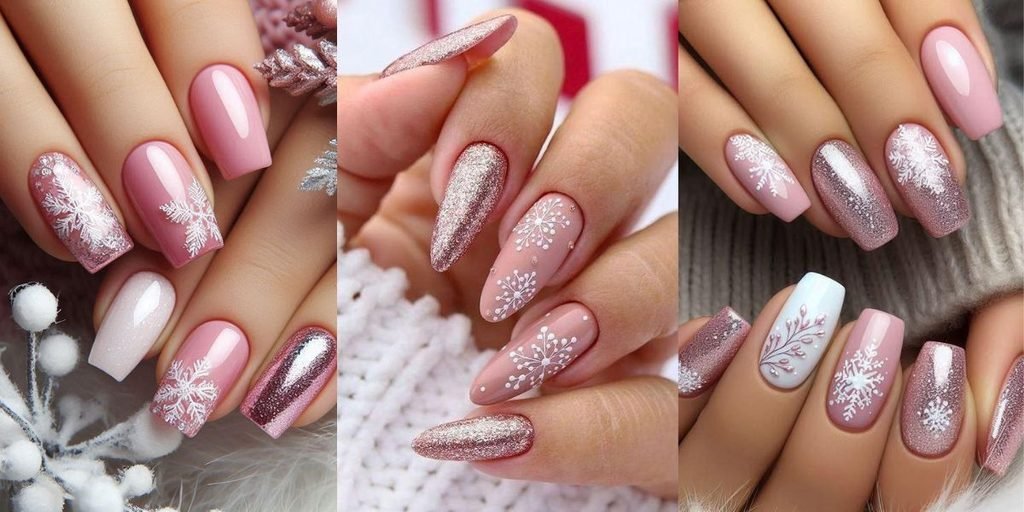
Pink Christmas nails are a lovely choice if you prefer soft colors to traditional red and green. Pale pink, rosy nude, and blush shades make a gentle base for white snowflakes, tiny stars, silver glitter, or small festive bows. The overall look can be sweet and delicate without losing its holiday feel.
For a simple design, paint most nails blush pink and add white snowflakes to one or two fingers. If you like more sparkle, use a silver glitter accent or a shimmering pink top coat. A darker rose shade can also work well if you want something more noticeable.
Pink nails are easy to coordinate with neutral winter clothing, soft sweaters, and silver jewelry. To keep the manicure from looking too busy, choose one main decoration and repeat it sparingly. You can also mix glossy pink nails with a single matte accent for a little texture.
💗 Make Pink Feel Festive
Pair blush polish with white snowflakes for a soft winter look, or add silver glitter when you want more shine. Keep the decorations light so the pink base remains the focus.
13. Plaid Christmas Nails
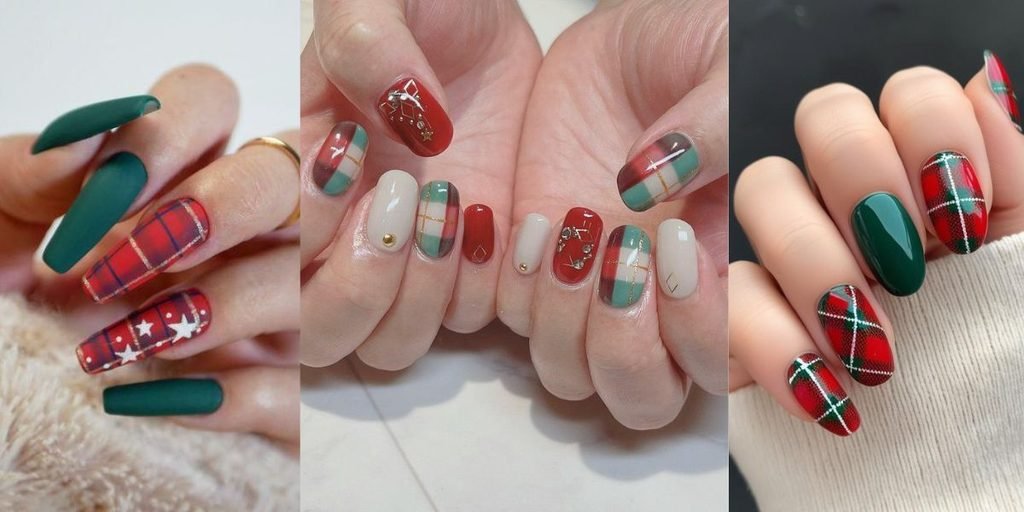
Plaid nails bring the look of a cozy holiday scarf to your manicure. Red, green, white, and fine dark lines create the familiar checked pattern. You can use all four colors for a traditional tartan look or simplify the design with red and white lines over a neutral base.
The plaid pattern has several intersecting lines, so it usually works best on one or two accent nails. Keep the other nails in a solid shade from the design, such as deep red or forest green. This makes the manicure look coordinated rather than crowded.
For hand-painted plaid, let each line dry before crossing it with another color. Fine brushes are helpful because thick stripes can cover too much of the base. If you want a crisp pattern without painting each line yourself, plaid nail stickers are another option.
| Plaid style | Color mix | Finish |
|---|---|---|
| Classic tartan | Red, green, white | Bold and cozy |
| Soft plaid | Pink, cream, red | Gentle and playful |
| Dark plaid | Green, black, gold | Rich and dramatic |
14. Christmas Holly Berry Nails
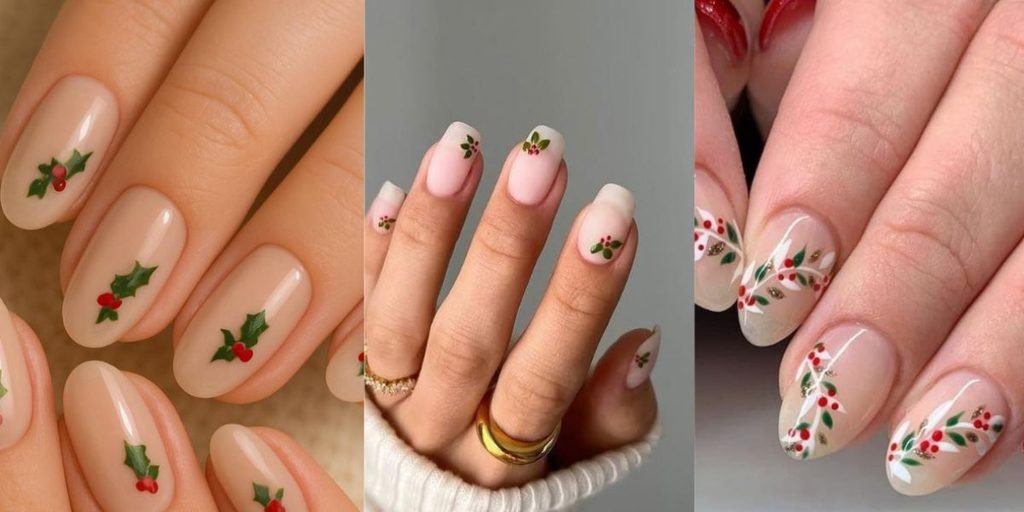
Holly berry nails use tiny green leaves and red dots to create a recognizable Christmas motif. The design is small enough to look elegant on a neutral base, but the traditional colors still make it feel seasonal. A sheer pink, cream, or milky white polish provides a clear background for the leaves and berries.
Try placing one holly sprig near the side of the nail or close to the tip. Two or three green leaves with a small cluster of red berries are usually enough. If you paint the motif on every nail, the overall effect can become busy, so consider leaving the other nails plain or using solid red polish.
A fine brush helps shape the leaves, while a dotting tool makes the berries easier to place. Let the green paint dry before adding the red dots, and finish with a top coat once the design is set.
🌿 Holly Motif: Keep It Balanced
Use two or three slim strokes for each sprig.
Add a small cluster with a dotting tool.
Leave space around the motif so it stands out.
15. Blue and Silver Snowy Nails
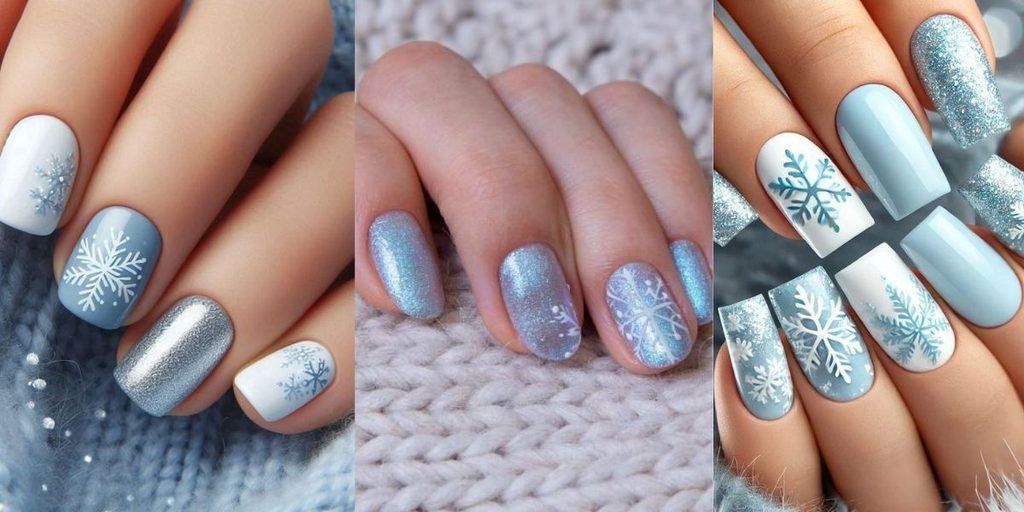
Blue and silver nails offer a frosty alternative to the usual Christmas colors. Pale icy blue creates a wintry base, while silver glitter adds the look of sparkling snow. You can use a deeper navy shade if you prefer more contrast, especially with white snowflakes or silver stars.
For a simple version, paint most nails pale blue and add silver glitter to one accent nail. Another option is to combine solid blue nails with a snowflake on a white or sheer base. A gradient that fades from blue to silver can also look pretty, although it may take more time to blend neatly.
This design suits anyone who likes cool-toned colors and a slightly icy finish. Pair it with silver rings or a soft grey outfit for a coordinated look. Keep the snowflake lines delicate, and use glitter selectively if you want the manicure to remain easy to wear every day.
❄️ Build an Icy Blue Manicure
Main nail color
Snowflake details
Glitter accents
16. Short Christmas Nails with Simple Festive Details
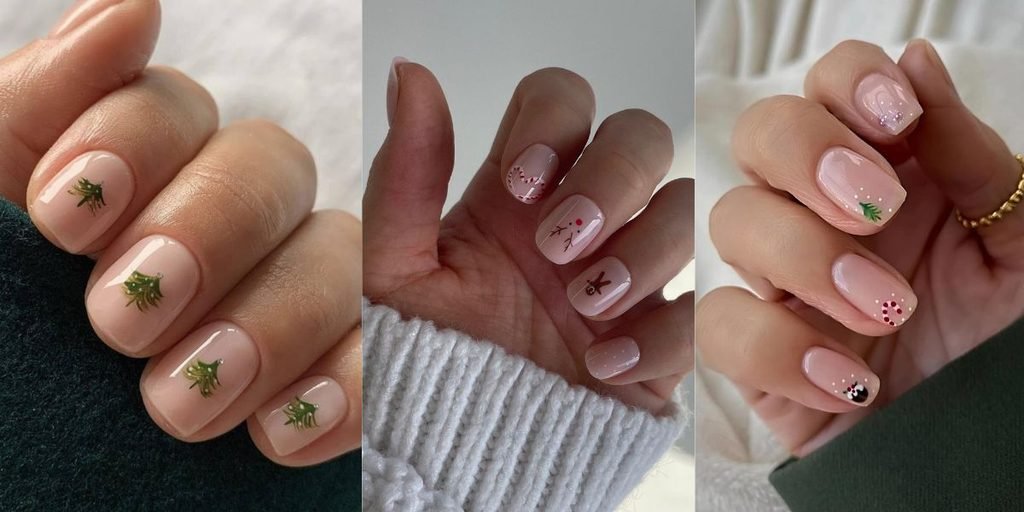
Short nails can look just as festive as long extensions. The trick is choosing details that suit the available space. Small stars, tiny dots, a single glitter accent, or a narrow red French tip can give a short manicure a Christmas feel without making the nails look crowded.
A simple combination is to paint the nails sheer pink or cream and add a small red dot or gold star to one or two fingers. You could also alternate solid red nails with a neutral accent nail. If you enjoy nail art, try a tiny tree or a simple candy cane stripe on just one nail rather than squeezing several motifs into each design.
Short nails are also practical if you spend time cooking, wrapping gifts, or doing hands-on holiday activities. Choose a nail shape that feels comfortable, keep the edges neat, and apply top coat carefully around the tips to help reduce premature chipping.
Short Nail Design Menu
⭐
Tiny starsFor a subtle festive detail.
🔴
Red dotsFor quick, simple nail art.
✨
Glitter tipsFor shine without busy patterns.
17. Christmas Present Nails with Tiny Gift Designs
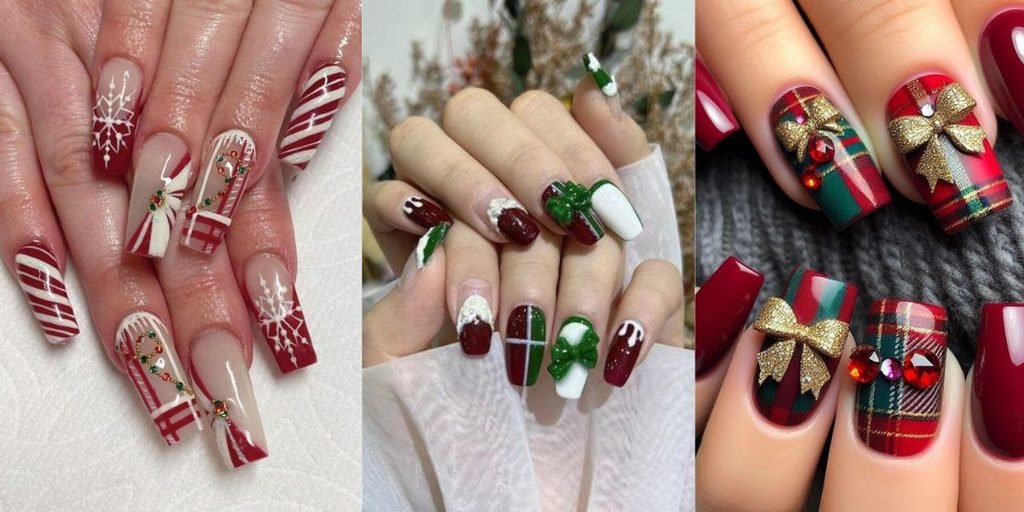
Gift box nails bring a fun Christmas detail to your manicure. Start with a nude, cream, or pale pink base, then paint small squares in festive colors like red, green, or gold. Add a thin contrasting line down the center and across each square to create the look of ribbon. A tiny bow on one accent nail completes the present-inspired design.
You can keep the look simple by decorating only the ring fingers and painting the rest of your nails a matching solid color. Red and gold gift designs feel traditional, while pink and white create a softer, playful version.
For small nails, use simple square shapes and fine lines rather than detailed bows. A dotting tool or thin nail art brush can help you keep the design tidy.
🎁 Gift Box Nail Color Ideas
Gift wrapping
Accent boxes
Ribbon details
18. Reindeer Christmas Nails
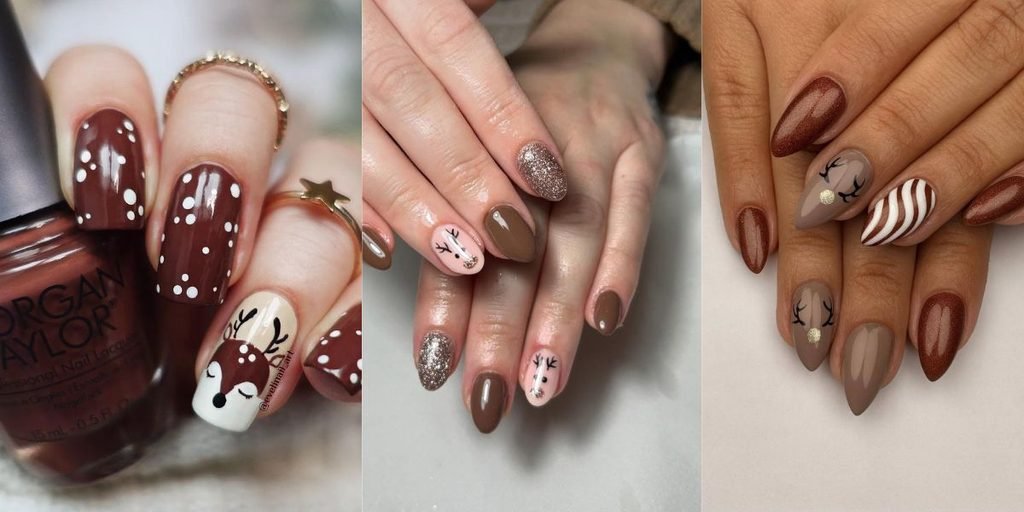
Reindeer nails are a cute option for anyone who enjoys character-inspired nail art. A warm brown base or a nude background can form the face, while small dark dots create the eyes and a red dot makes the nose. Add tiny antlers with a fine brush to make the design recognizable.
Rudolph-inspired nails look especially playful with a bright red nose, but you can choose a neutral brown nose for a softer style. Keep the reindeer face on one or two accent nails so the tiny features remain clear. Plain cream, brown, or red polish on the remaining fingers helps balance the manicure.
If you are painting the design at home, allow the base color to dry before adding the face. Use a dotting tool for the eyes and nose, and keep the antlers small enough to fit comfortably on the nail.
🦌 Reindeer Detail Tip
Use a neutral base, two tiny eyes, and one nose as your starting point. Add antlers only after the face details have dried to keep the design neat.
19. Black and Gold Christmas Nails
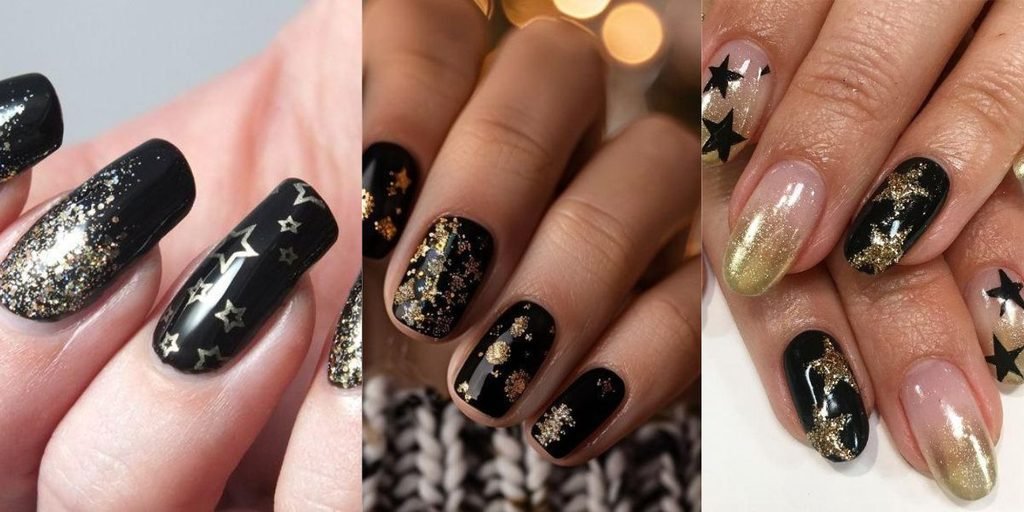
Black and gold Christmas nails are ideal if you prefer a bold manicure rather than traditional holiday colors. Glossy black polish creates a dramatic base, while gold stars, fine lines, or foil add a festive sparkle. The combination looks especially striking for evening celebrations and party outfits.
You can paint every nail black and decorate just one or two with gold details. Another option is to use a gold glitter accent nail alongside solid black nails. If you prefer a more detailed design, add tiny stars or delicate gold dots rather than filling every nail with decoration.
For the cleanest finish, apply black polish in thin layers and let it dry fully before adding gold nail art. A glossy top coat brings the colors together, while a matte black base can create an interesting contrast with shiny gold accents.
20. Christmas Ornament Nail Art
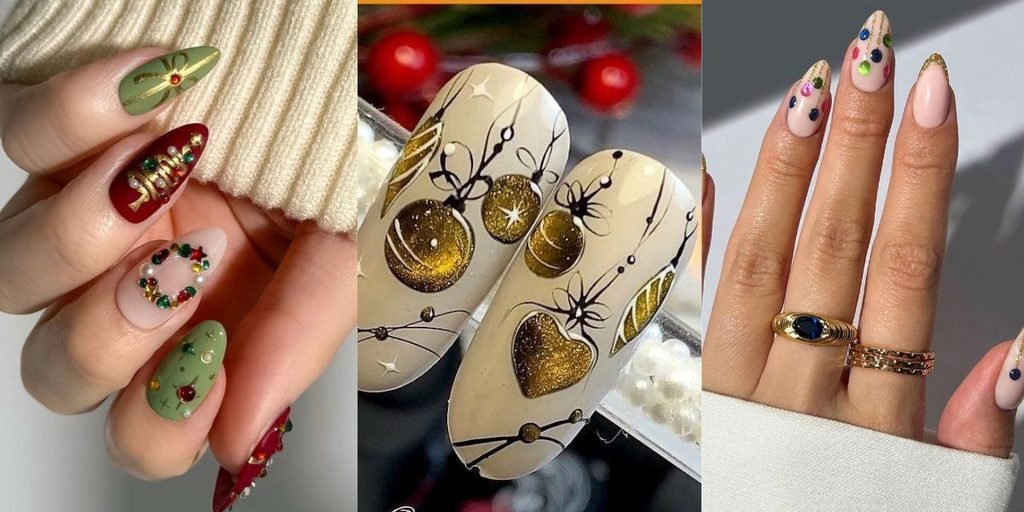
Christmas ornament nails take inspiration from the colorful baubles hung on a holiday tree. A cream or sheer pink base gives the design space, while rounded shapes in red, green, blue, or gold resemble miniature ornaments. Add a thin line above each shape to create the hanging string, then finish with a small metallic detail.
For a balanced manicure, use ornament art on an accent nail and keep the others in a coordinating color. If you like a more colorful look, use a different ornament shade on each nail, but keep the shapes simple so they do not compete with one another.
A fine brush helps with the hanging lines, while a dotting tool can create small rounded ornaments. Gold details work well with traditional red and green, while silver can complement icy blue or white bases.
🎄 Ornament Design Checklist
✓ Start with a light base for contrast.
✓ Paint small rounded shapes in festive colors.
✓ Add a fine hanging line and a tiny metallic accent.
✓ Keep the remaining nails simple to highlight the ornaments.
21. Velvet Cat-Eye Christmas Nails
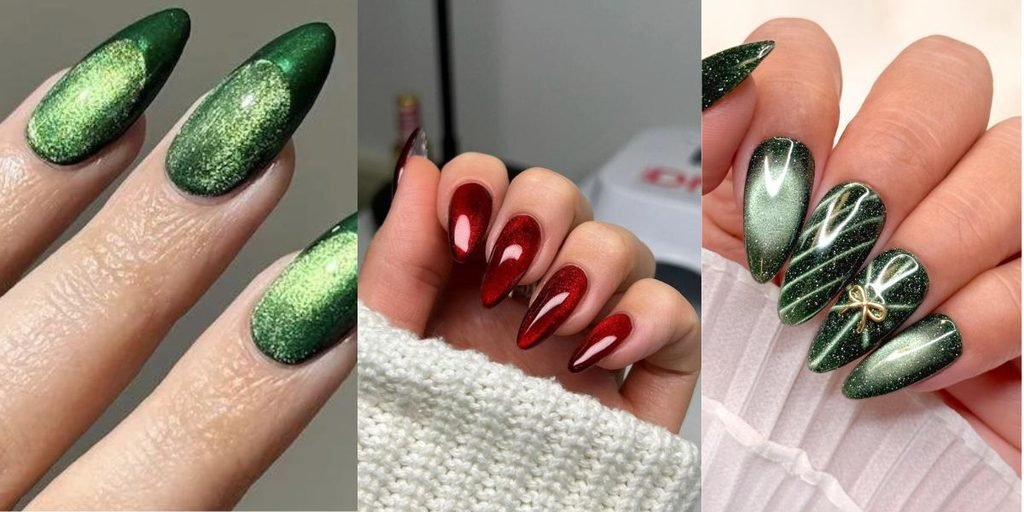
Velvet cat-eye nails have a shimmering finish that shifts with the light. The effect is created with magnetic nail polish, which contains particles that can be moved with a special magnet before the polish is cured or set, depending on the product. Deep red, emerald green, and burgundy are especially suited to a festive manicure.
Unlike designs with painted characters, this look relies on color and shine. You can wear it across all your nails or add a single cat-eye accent to a simpler red or green manicure. The moving shimmer gives the nails depth without needing stars, snowflakes, or glitter decorations.
This style is often easiest to achieve with the correct magnetic polish and technique at a salon. If using gel products, follow the manufacturer’s curing directions and avoid skin contact with uncured gel.
✨ Choose Your Velvet Holiday Shade
Classic and festive
Rich and jewel-like
Deep and understated
How to Make Your Christmas Manicure Last
Once you choose your favorite Christmas nail design, a few simple steps can help it stay neat throughout the holiday season.
- Prepare your nails first. Remove old polish, gently shape your nails, and make sure the nail surface is clean and dry before applying polish.
- Use thin coats. Several thin layers generally dry more evenly than one thick coat. Give each layer enough time to set.
- Seal the design. A compatible top coat helps protect painted details and adds shine. Follow the product instructions for drying or curing.
- Protect your hands. Wear gloves for cleaning and other tasks involving water or household products.
- Refresh the finish when needed. If your regular polish begins to lose shine, apply a fresh top coat if the existing manicure is still in good condition.
If you choose gel polish, follow the manufacturer’s curing instructions and avoid getting uncured product on your skin. Stop using any product that causes irritation.
Conclusion
The best Christmas nail design is one that feels like you. Classic red nails are easy to wear, gold glitter brings extra sparkle, and snowflakes, candy canes, holly berries, and gingerbread details make a manicure feel playful and seasonal. You can also keep things simple with milky white polish, pink shades, or tiny festive accents on short nails.
Before booking your next manicure, save a few favorite designs and decide which colors and details suit your style. You can recreate the ideas at home or take a reference image to your nail technician. Save this Christmas nail inspiration list so you have fresh ideas ready when the holiday season arrives.